If you want to find out what lead to a conversion (a desired action made by a customer), you'll have to track user activity after an ad impression, and conversion tracking does just that. By setting up conversion tracking on your online store, you're able to see the path a user took after interacting with your ad- what they clicked on, which part of your site they explored, if they signup for your newsletter, et cetera. This guide will show you how to setup conversion tracking for Google Ads in Shopify.
Follow the simple steps below:
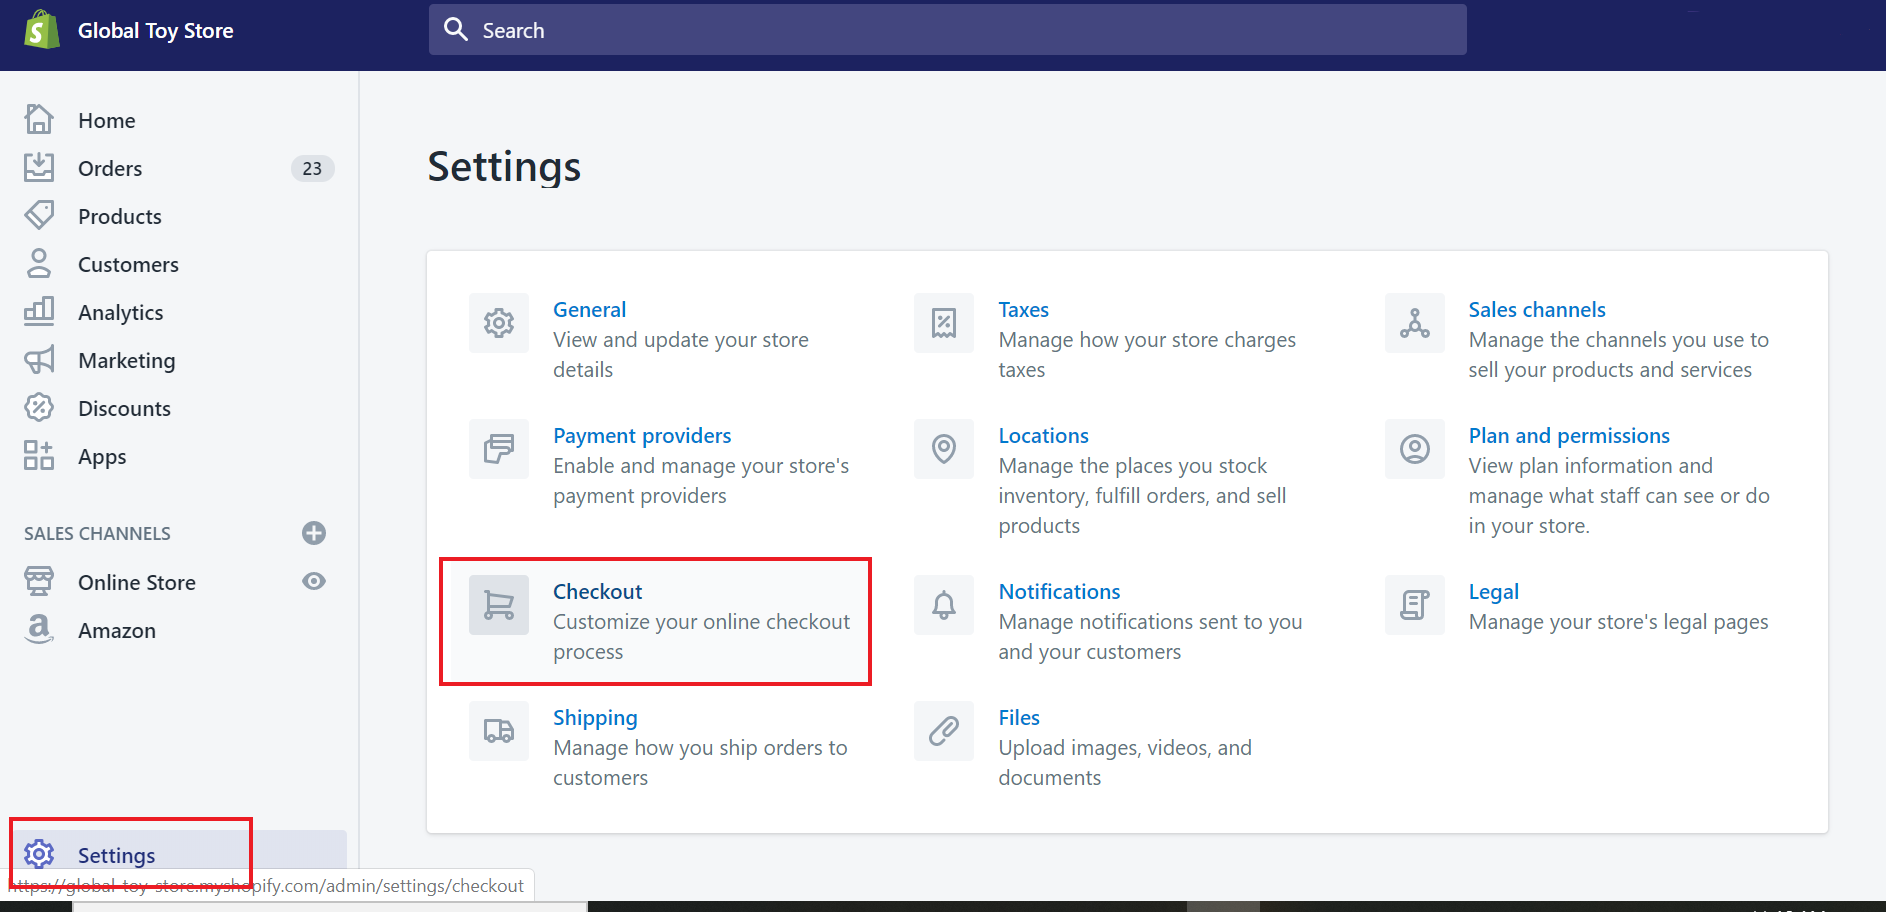
Step 1: Log into your Shopify store
Step 2: Go to Settings > Checkout
Step 3: Get your Global Site Tag and Event Snippet
Log into your Google Ads account and go to Tools&Settings >Measurement > Conversions
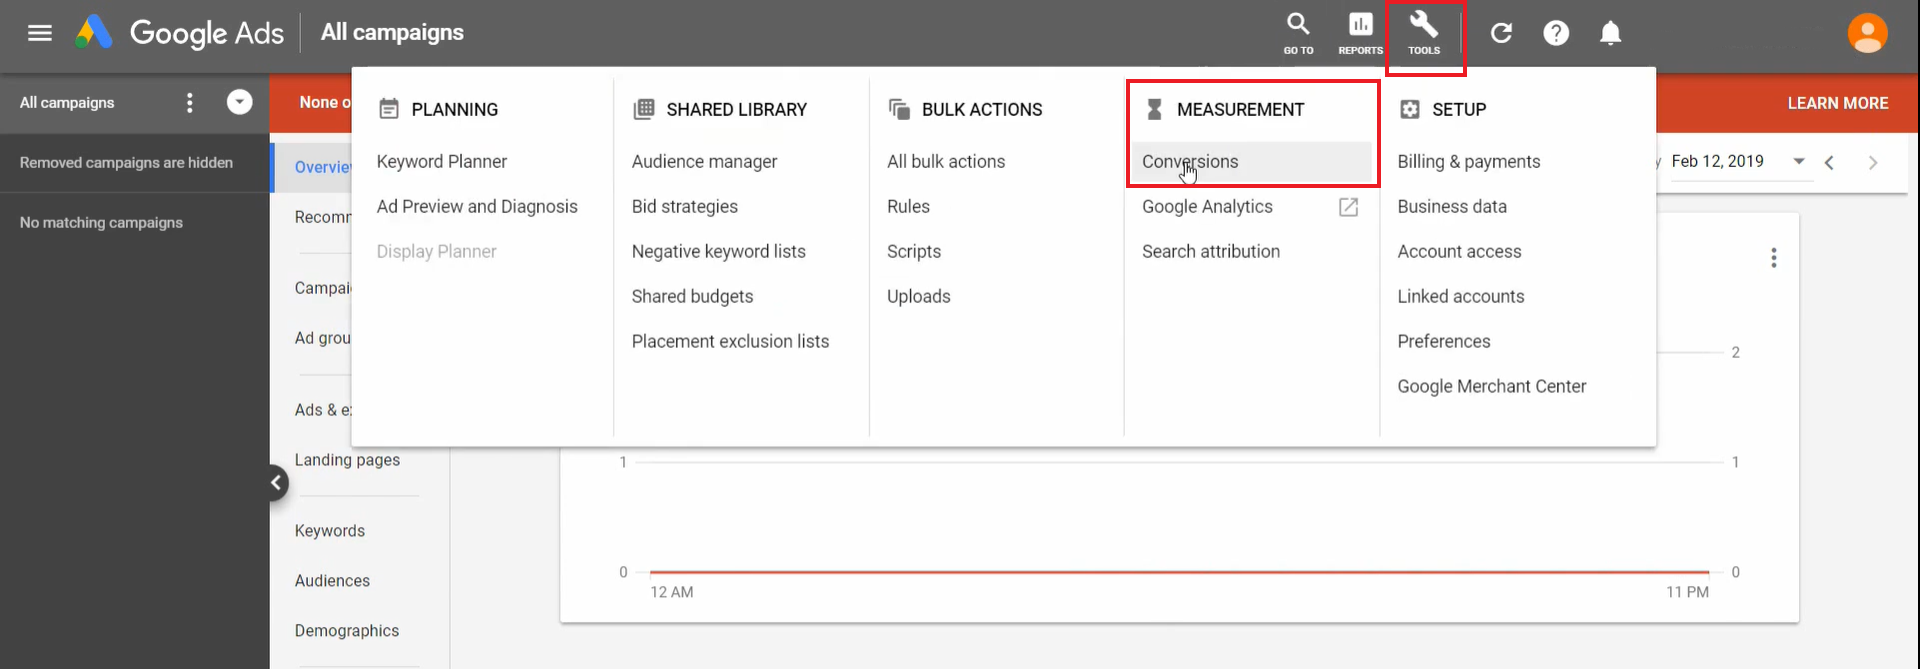
Click on the + icon

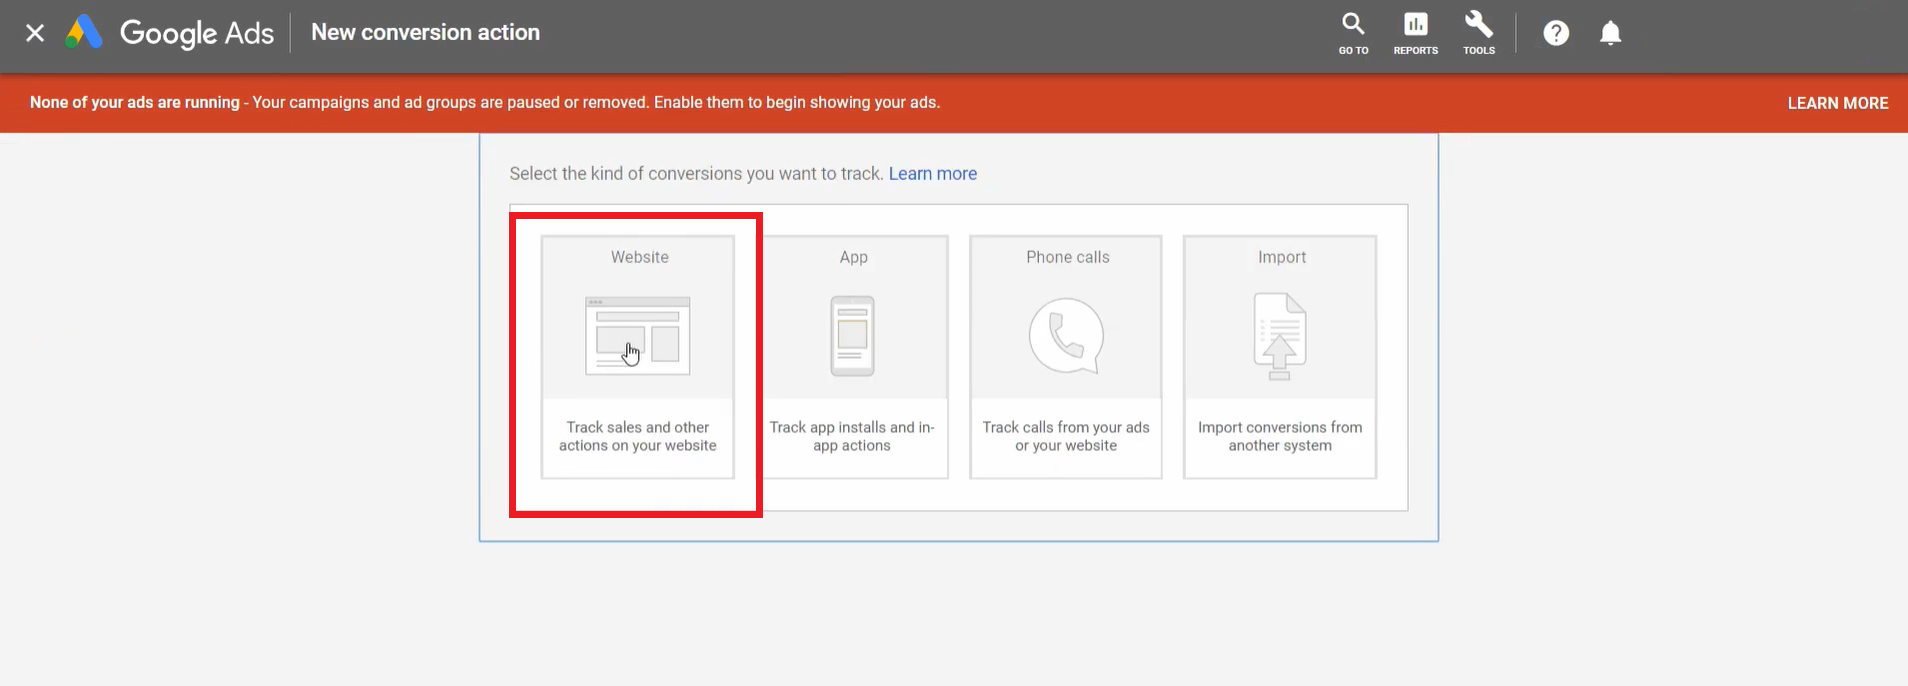
Select Website
Enter your conversion name, category and value and leave the rest of the settings as default.
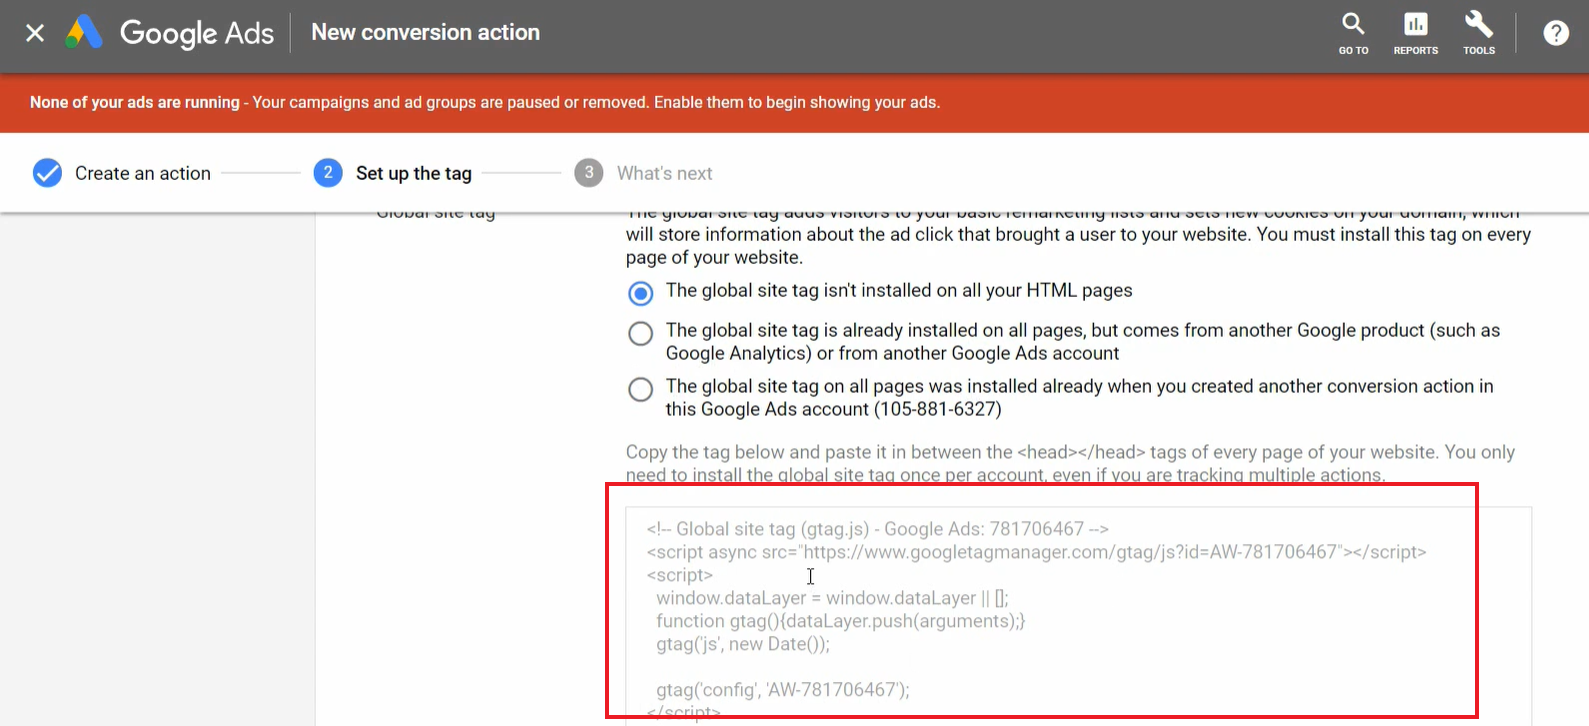
Under Tag Setup, click on Install the Tag Yourself.
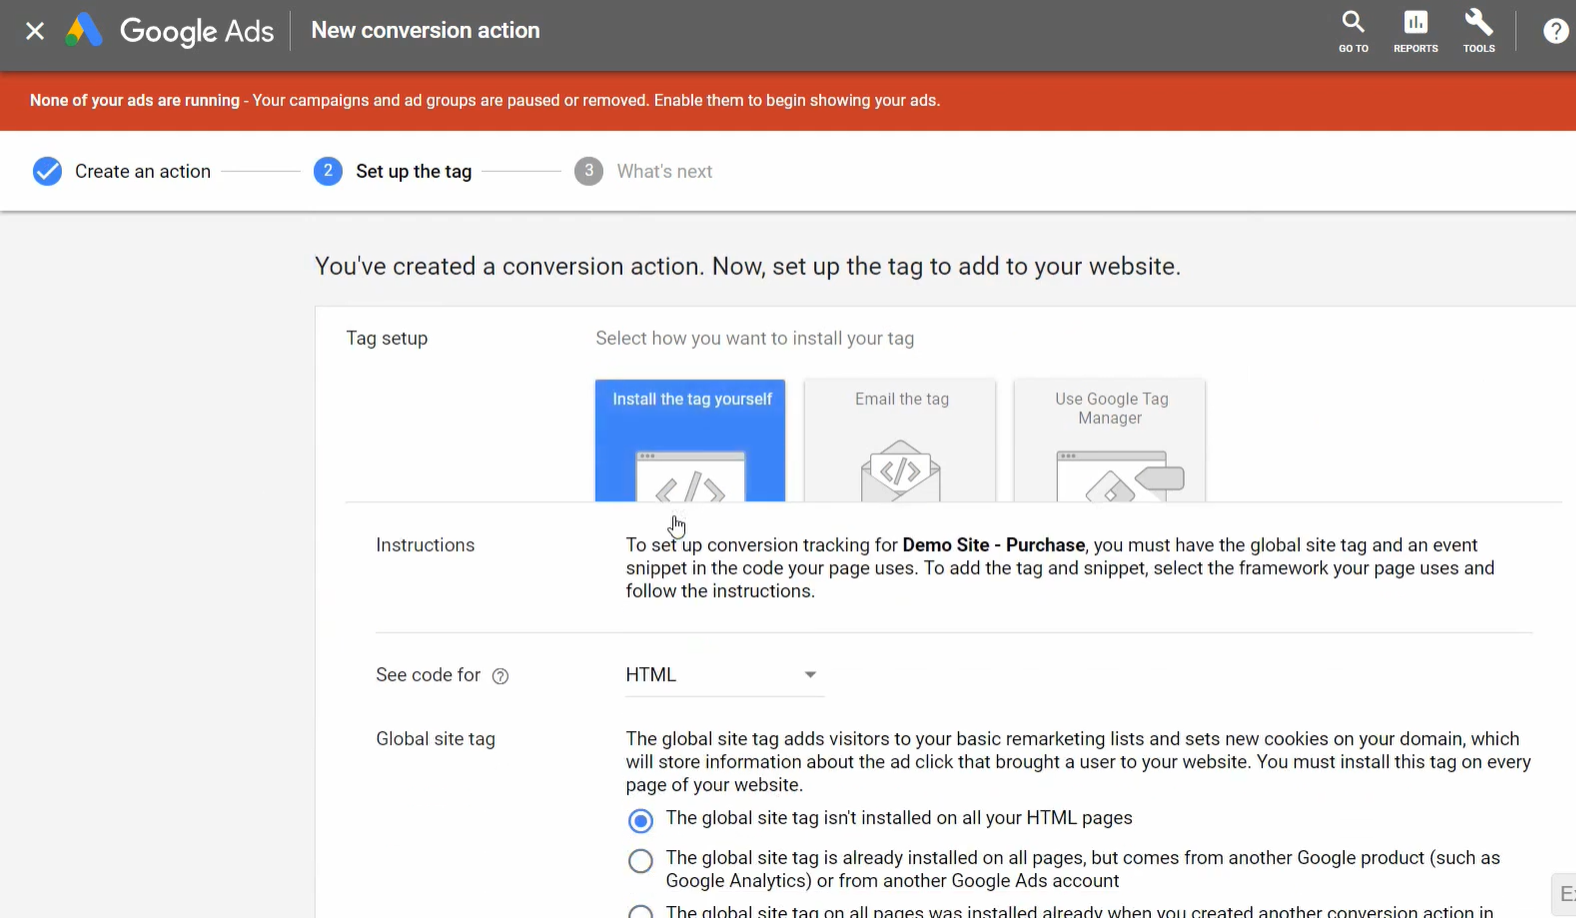
You can copy the Global Site Tag below, but Ensure you chance the ID highlighted in red to the ID shown in your Ads Account.
<!-- Global site tag (gtag.js) - Google Ads: 123456789123 -->
<script async src="https://www.googletagmanager.com/gtag/js?id=xx-123456789123"></script>
<script>
  window.dataLayer = window.dataLayer || [];
  function gtag(){dataLayer.push(arguments);}
  gtag('js', new Date());

  gtag('config', 'xx-123456789123');
</script>
E.g. In the image below, the correct ID would be 'AW-781706467'
Below the Global Site Tag is the Event Snippet. Again, this will show the correct ID for your store, which in this example is 'AW-781706467/Q7wkCJ2lk5UBEOPJ3_QC'
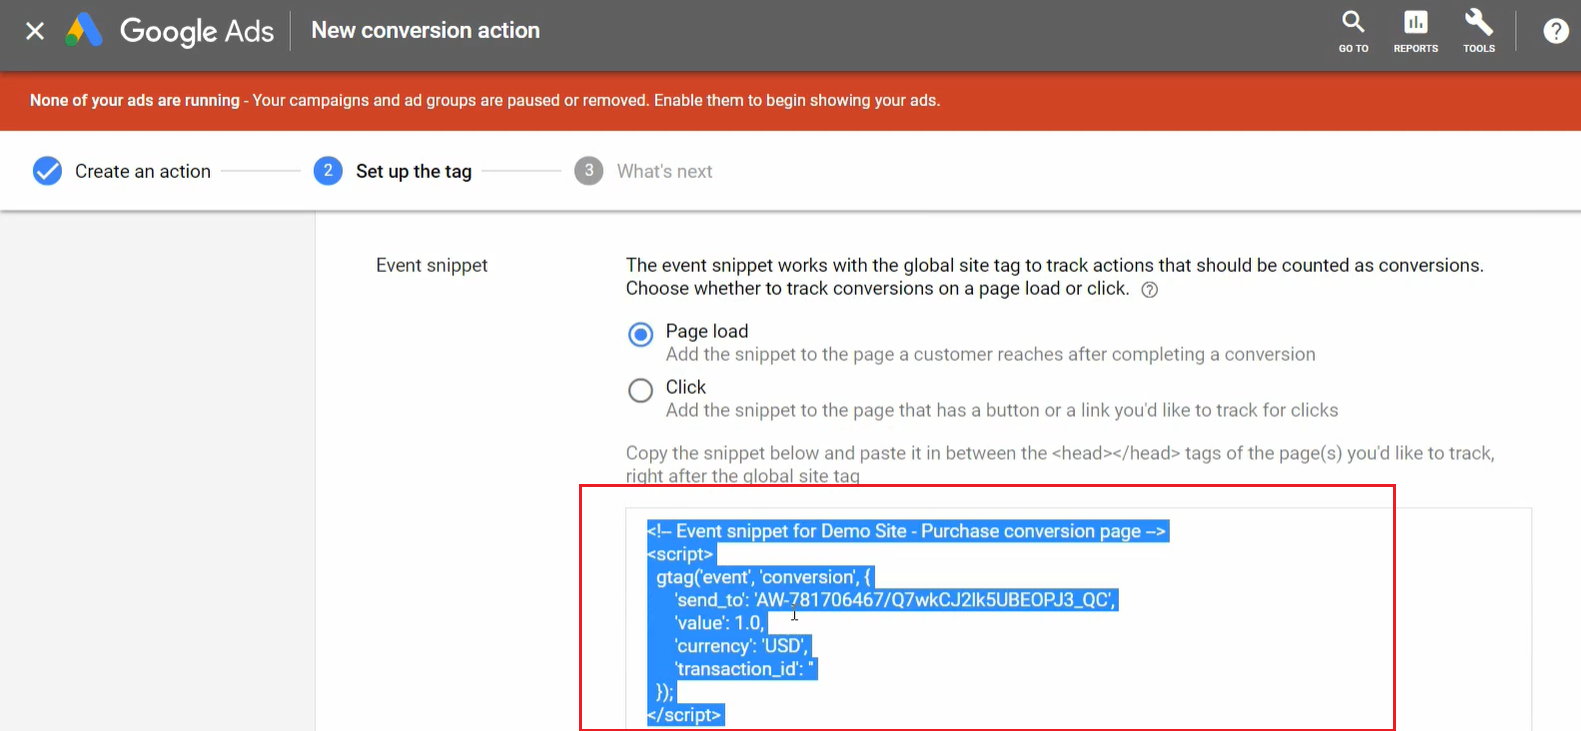
You can copy the event snippet below, but REMEMBER to CHANGE THE ID to the one shown in your Ads account.
<script>
gtag('event', 'conversion', {
'send_to': 'xx-123456789123/lkadsjKDweLK45W',
'value': {{ total_price | money_without_currency | remove:',' }},
'currency': '{{ shop.currency }}',
'transaction_id': '{{ order.order_number }}'
});
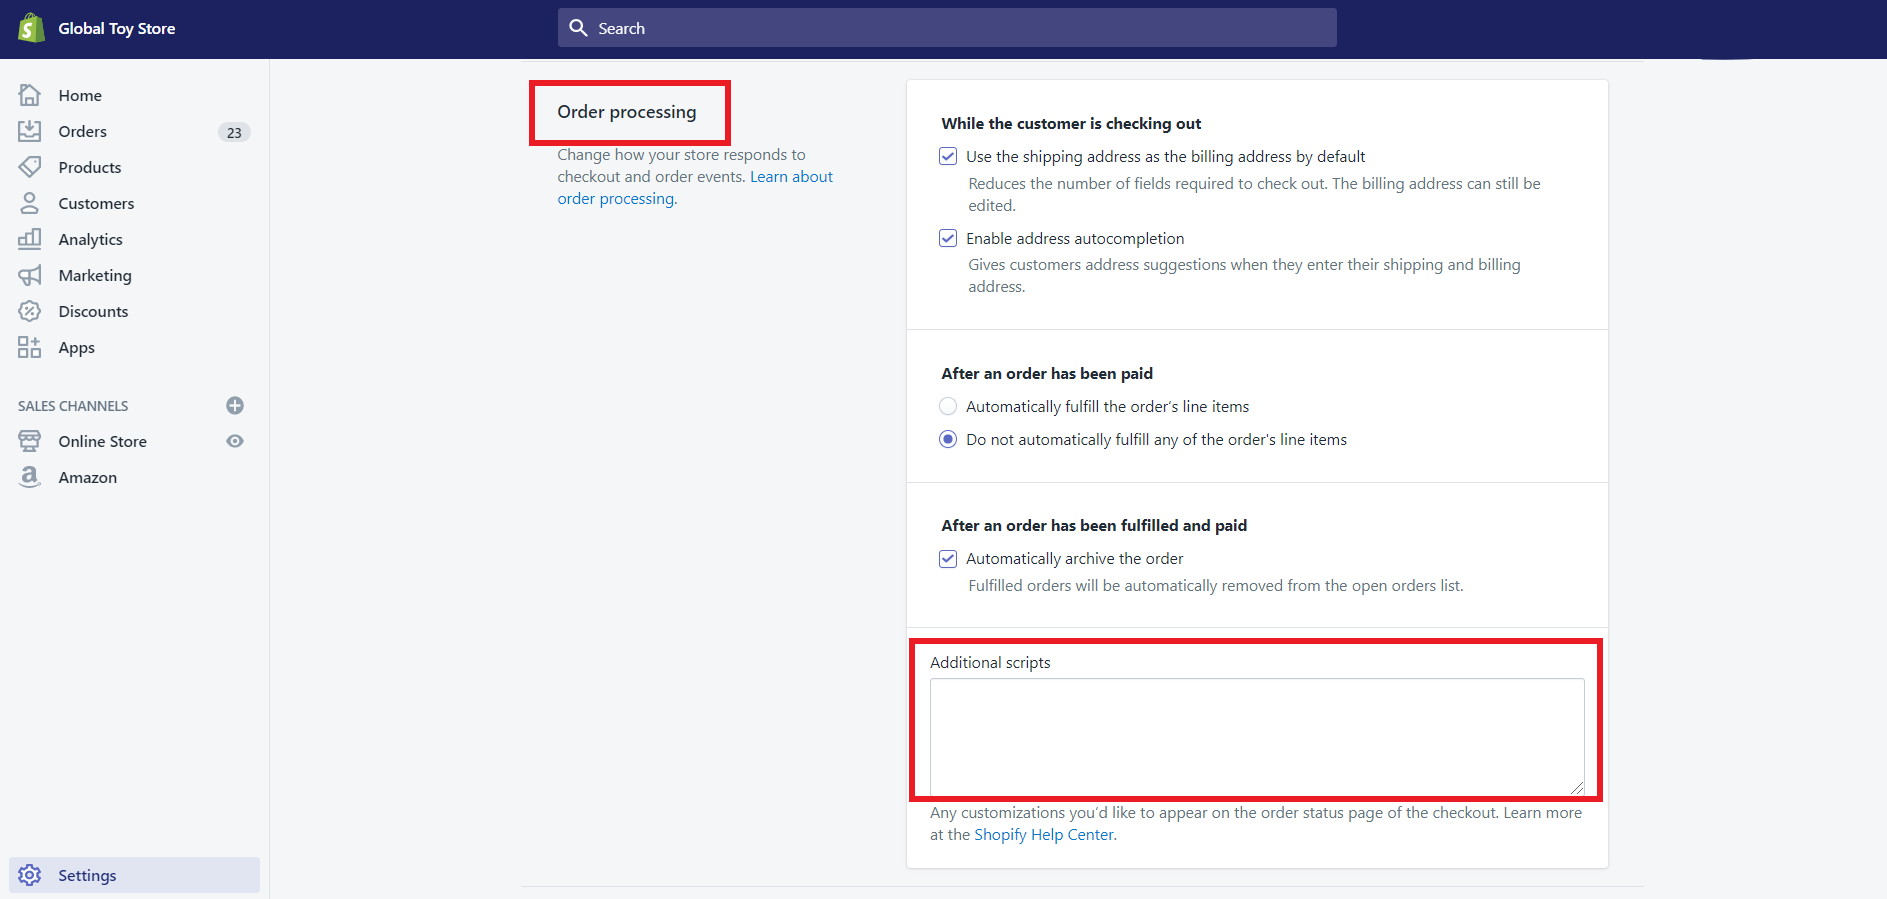
</script>Step 4: Add Global Site Tag and Event Snippet to your store code
Go back to your Shopify store, and go to Settings > Checkout as from step 2 . Then scroll down to Order Processing, where there will be a box called Additional Scripts. This is where you paste the Global Site Tag, followed by the Event Snippet.
Click save and you're good to go! Now you can view your conversions from Google Ads.
Was this article helpful?
That’s Great!
Thank you for your feedback
Sorry! We couldn't be helpful
Thank you for your feedback
Feedback sent
We appreciate your effort and will try to fix the article
